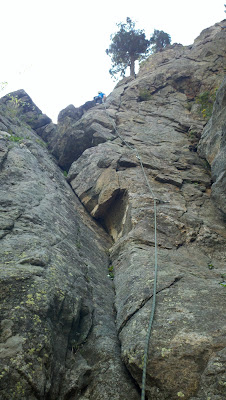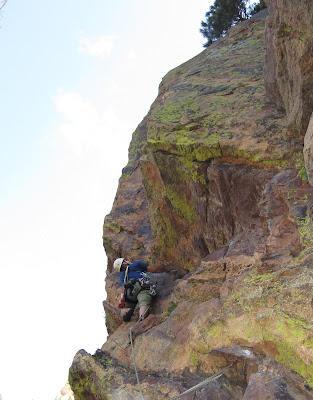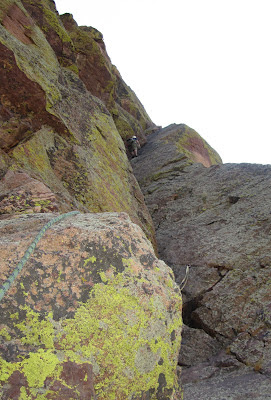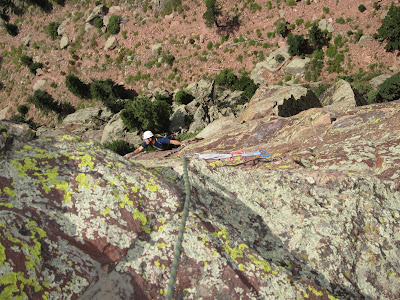
(Photo: A climber on Rewritten (5.7) in Eldorado Canyon. Shot from the top of pitch three of The Yellow Spur (5.9+).)
Two years ago I had my first opportunity to climb in Colorado. I did any easy route called The Bomb (5.4) in Eldorado Canyon with my old friend Greg while I was in the state for a family vacation.
While that experience was a lot of fun, I couldn't help but feel it was also a lost opportunity. Surrounded by legendary, challenging climbs, we had done something well below my ability level, in part because Greg was out of climbing shape and in part due to my own insecurities. After this first taste of Eldo I was determined to get more confident and come back to climb some of the storied classics in the canyon. I hoped that I would some day get the chance.
This year another August family vacation provided that chance. We were in Steamboat Springs for a week, and then planned to be close to Denver for several days before returning to NYC. While near Denver I would have a couple of days to go climbing. With thousands upon thousands of climbs nearby, the possibilities seemed endless.
I had a ready partner in my old mentor Vass. Vass had moved back to Boulder from New York last year. During the time when he lived in NYC, Vass had been one of my best partners. He had really taught me a lot. I admired his calm competence with climbing systems and his reliably good footwork. Although he regularly claimed to be out of good climbing form, he would nevertheless sail up anything I could climb and make it look effortless-- putting my clumsy efforts to shame. Vass always encouraged me to move forward. His support made me feel I was capable of doing more; it seemed I was usually at my best when climbing with Vass. I did my first 5.7, 5.8, and 5.9 leads with him. I was psyched to be climbing with him again, especially since our last climbing day hadn't really gone so well.
We met up on a Sunday and decided to spend our first day in Boulder Canyon getting reacquainted and shaking off the rust. Vass and I figured we could do some moderate sport and trad and then on our second day we could go tackle one of the bigger objectives I was looking to climb in Eldorado Canyon. There were so many long classics in Eldo to choose from, climbs like Rewritten (5.7), the Bastille Crack (5.7+) , Ruper (5.8), the Green Spur (5.9), or maybe even the Yellow Spur (5.9+). But first we'd take a day just to get loose and feel good.
I was excited to check out Boulder Canyon. It is a place with a storied history, but I was afraid I wouldn't really care for all the bolted climbs I'd heard about. (I prefer placing gear.) As we drove in, I found the canyon beautiful, but then all of these Front Range canyons are so beautiful. They really have it good in Colorado. Consistent with its history, Boulder Canyon's climbingis varied. You can find recently (over-) bolted sport climbs up slabs right next to sandbagged old traditional climbs that go up cracks.
Vass suggested we start on Tonnere Tower, a formation withmoderate climbing that unaccountably has been overlooked until relatively recently. Vass was thinking we would warm up on bolted stuff, then once we got bored do some trad climbing. Our first climb was Los Pinos (The Pines), a multi-pitch route that rises right out of the river. I led the first two pitches in one and then we rapped off. This climb has good moves and it made for a nice warm-up. I found the situation with the bolts to be rather curious. There are numerous bolts right next to bomber gear cracks the whole way up, but then the finishing roof on pitch two requires that you place your own pro. I don't know what the route developers were thinking. I couldn't quite make sense of the difficulty ratings either. I thought nothing on the 5.9 pitch two was as hard as the opening slab moves on the 5.8 pitch one. But whatever, it was a good time.

(Photo: Vass leading pitch one of Buried Treasure (5.8+).)
We then went around the corner and did two nice single-pitch sport routes, Twilight Time (5.9+ and fun) and Bobby's Back (supposedly 5.10d). Bobby's Back features rather delicate face climbing for a few moves past the second and third bolts. Though neither of us led it perfectly clean I'm pretty sure I could get it now after doing it once.
We finished our time at Tonnere Tower with a two-pitch sport route called Buried Treasure (5.8+), electing to add to it the 5.10a final pitch of Stayin' Alive. These three pitches had good climbing but if there is a move on Stayin' Alive that is harder than 5.8 I'd like you to show it to me! Putting the difficulty rating aside, Stayin' Alive was the nicest pitch we did on the tower, with good starting face moves and a fun easy dihedral.
By now we had done seven pitches and our day was slipping away. I had enjoyed the climbing so far, but I have to say my initial apprehensions were confirmed. I'd rather do trad lines up natural features than bolted lines up faces. That's just the way I am. Vass wasn't surprised. He said he wanted me to see Castle Rock, which is filled with old-school traditional climbs. We drove over there and Vass sent me up a 5.8 called Bailey's Overhang.
I could tell I was going to like this one before I even got started. Bailey's Overhang is good stuff indeed, a natural line following cracks and a corner up to a big roof. I really enjoyed leading this. I felt solid while jamming through the steep opening moves. Then I scared myself a little at the roof when I couldn't get my right foot up where I wanted it. But my back was against the left wall and there was no way I was going to fall out. After stepping down and resetting the move I got through it just fine. Vass made it look easy using holds to the left that had eluded me.

(Photo: Vass pulling through the roof on Bailey's Overhang (5.8).)
We didn't have much time left so we threw a top rope over a route just left of Bailey's called Curving Crack (5.9). I loved this one as well, and felt very good climbing it. It follows another natural line, a crack up a corner that gets steeper as it rises. Some tense laybacking with somewhat slippery hands gets it done. I wished we'd had time for me to lead it, but it was a great finish to the day.
There is a lifetime of climbing in Boulder Canyon. I'd love to go back to see more.
After our day in Boulder Canyon I decided I was climbing pretty well. I proposed we meet up early on our second day (a Monday) and head straight for my most ambitious objective in Eldorado Canyon: the Yellow Spur (5.9+). I wanted to tackle something big, and this six-pitch classic, which some call the best 5.9 in Colorado, seemed to fit the bill. I felt I was ready to lead the crux pitches.

(Photo: View of the Flatirons from the road into Eldorado Canyon.)
When we got to Eldo I was thrilled to find that the lot was almost empty. We humped up the trail to the far end of the Redgarden Wall to find the area deserted. I was very happy not to have to worry about faster parties breathing down our necks, and psyched not to have an audience for the "problematical" 5.9 first pitch.
This pitch was, for me, the crux of the whole route. It goes up a right-facing corner to a roof. There is a piton in the roof, maybe 15-20 feet off the ground, but it doesn't appear that there is any useful pro before the piton. In his recent guidebook Steve Levin warns of the potential for ground fall if you fail to make the clip at this piton. The climbing here is also a little strange and awkward. There is a good handhold on the side wall, but stepping up to the pin puts you off-balance.
Wemay have set a record by placing four (!) pieces of pro before clipping the pin. First Vass placed a piece for me off to the side before I even left the ground, which he then cleaned once I got other gear. I put a blue Alien in the first finger pocket as soon as I was done using the pocket to step up. And then I placed two equalized micro nuts in a thin seam on the side of the juggy hold on the left wall. I thought the nuts were solid, but I worried that the rock quality might be a problem. I feared that if I fell, the force of the fall would rip the good jug right off the left wall. If that happened, I'd not only hit the ground and break both my legs, but I'd also be known forever as the idiot who changed the standard start of the Yellow Spur from a 5.9 to a 5.11 by destroying the crucial hold.
As luck would have it, I didn't fall. I stemmed wide and was able to reach up, blind, to clip the pin. Then I was able to commit to the slopey rail beneath the pin and make the awkward exit from the corner.
Whew! The rest of the pitch was a breeze, traversing left to an easy roof problem. At least, I thought it was easy. Here is the place where I get to be the guy who says "in the Gunks, this roof would never be a 5.9!" Well, I thought the supposed crux 5.9 roof would probably be rated a 5.7 in the Gunks. There are great holds for the hands and feet. I sailed right over it, feeling great. Being a Gunks climber does at times have its advantages.

(Photo: Vass heading into the 5.8 pitch two hanging corner on the Yellow Spur.)
Pitch two was Vass' lead. This pitch is high quality, with a committing step up into a hanging right-facing corner and a few good 5.8 face moves up the corner to a ledge. My lead of pitch three was also fun, with mostly juggy 5.7 climbing up to an interesting 5.8 V-slot.

(Photo: Sorry for the butt shot, but this is me leading into the 5.8 slot on pitch three of the Yellow Spur.)
Pitch four of the Yellow Spur is where the real business begins again. This was Vass' lead, and while he was up there I wasn't thinking much about what he was doing, because I was preoccupied with getting mentally ready for pitch five, the hardest one on the route. But when he reached the belay and I started to come up behind him, I realized that pitch four is not something to treat lightly. It is not the pitch people talk about the most but it is challenging and pretty fantastic. I was jealous that Vass had led it. The pitch climbs easily up a huge dihedral to a roof, where an exposed, rising hand traverse takes you out and up to a pedestal belay stance. It is rated 5.8+, but I think the traverse is mentally harder than that. There are footholds but they get smaller and smaller as the position gets more and more airy. And then after you commit, turn the corner and start to move up to the pedestal, there more moves to be made before you reach the belay stance.

(Photo: Vass doing the exposed rising traverse on the 5.8+ pitch four of the Yellow Spur.)
And what a belay stance. We were now standing on a tiny shelf, something like 400 feet off the ground, at the base of the final headwall beneath the pointed summit of the Redgarden Wall's Tower One. Above me was a line of pitons showing the way up a steep face at 5.9+. The atmosphere was electric.

(Photo: Looking down on Vass at the pedestal belay below the crux pitch of the Yellow Spur.)
As I stood there I felt pretty sure I was ready. I could hardly contain my excitement. This was exactly what I'd dreamed of, two years before, when I'd first gotten a taste of Eldorado Canyon. I wanted to work hard, get fitter and better, and feel comfortable going somewhere other than the Gunks and jumping on a world-class 5.9.
I was on the verge of making the dream a reality but I had to forget all that and actually climb the thing.
Vass asked me if I wanted to look at the topo but I knew what I had to do and I just wanted to get going. We had been in the shade all morning but now we had emerged into the bright sunshine and I could feel the heat building. It was now or never and I did not want to hesitate.
The pitch is insanely great. It starts out with good holds leading up a crack. After I backed up a piton with a small cam I had to start the hard stuff, making a committing step over to the right using tiny crimps for the hands and small footholds. Once established on the face, several thin, pumpy moves up a shallow corner got me past more pins to a welcome stance. I let out a huge sigh of relief when it was done. I was elated but still had to do the mentally challenging rising traverse up to the exposed arete. Known as the "Robbins Traverse," this beautiful sequence goes at a reasonable 5.7+ but is completely devoid of gear.

(Photo: Vass working through the crux 5.9+ section of pitch five of the Yellow Spur.)
About two steps into this traverse the sequence is devious. There is a 5.7 way to do it but the crucial hold is hidden. Maybe there is an easier way to find it, but I had to make a committing step up using a fragile flake for an undercling. Feeling around with the other hand, in a very tenuous position, I was fortunate to find the right way to go. Once I found the hold, the pitch was in the bag. I lingered over every move to the arete, enjoying the scenery.

(Photo: Vass partway up the 5.6 final pitch to the top of the Yellow Spur.)
My work was done. The final pitch was Vass' lead. Levin rates it at 5.6 R, and itis easy but run out for the second half. It is a beautiful pitch, which I might liken to the arete pitch of Directissima in the Gunks-- if Directissima were several hundred feet higher. It is a fitting payoff for the route, ending the climb on a high note. Vass had no trouble with it, and seemed to enjoy it all the way to the top.

(Photo: taking in the exposure on the final pitch of the Yellow Spur.)
I also enjoyed climbing the final pitch, but as I got close to the top I got very anxious about the weather. A black cloud had suddenly rolled in as Vass began leading the pitch. Both of us felt the storm was likely to just miss us as it passed overhead but I could see rain in the distance and as I climbed I could hear the rumble of thunder growing closer and closer. The top of a pointed tower was the last place I wanted to be during an electrical storm.
Once I reached the top it fell to me to traverse the pointed "roof" of Tower One to reach the Dirty Deed rappel, which was our quickest route to the ground. This rappel route, which goes down a loose chimney, isn't recommended by Levin but on a weekday I wasn't worried about knocking rocks onto climbers below and I wanted to get down as soon as possible. The roof traverse was somewhat nerve-wracking for me, as I did it accompanied by continuing thunder and a few rain drops. I stayed on belay and placed a few pieces of gear along the traverse. (I can't imagine doing it without at least staying roped up.)

(Photo: Hiking down to the car. Goodbye, Eldo.)
Once I reached the rappel station all was well. The skies cleared and we descended without incident.
Climbing the Yellow Spur was one of the most satisfying climbing experiences I've ever had. The route follows a gorgeous line and features numerous interesting cruxes. It lives up to its billing as a destination climb.
But for me it was more than just a great climb. The Yellow Spur validated what I've been doing. I don't get outside enough. I feel like my progress is slow. But climbing the Yellow Spur provided proof that the progress is there; it is real. The whole climb felt within my limits. There was never a moment that felt out of control. We made the right choices throughout the climb and approached it in as safe and reasonable a manner as possible. I could never have climbed it in this fashion this two years ago, when I first visited Eldorado Canyon.
Thank you, Eldo! I don't know when I will ever get back again, but I can't wait.
 Fall is officially here and winter is not far on its tail. Mother nature has already brought rain, snow and high winds to the Mountain -Paradise received about 4 inches of snow over the past 24 hours and we're expecting both significant rain and snow over the next few days. The National Weather System has put out a winter weather advisory for the next few days; we're expecting 6" - 10" of snow from this evening through Wednesday and then the freezing level is rising to between 8000' - 9000' and we could receive potentially 6" - 14" of rain. Sound eeriely familiar...? Check out some of the photos from blogs on the flood of 2006 to refresh your memory. Let's hope no such catastraphe befalls us this year.
  For questions and/or issues regarding this blog or related to climbing at Mount Rainier, call the Climbing Program at (360) 569-6009 or contact Mike Gauthier at the email provided at the bottom of this page. Any general inquiries or questions specifically related to park policy or procedures can be directed to the Longmire Museum at (360) 569-2211, extension 3314 or by email at MORAinfo@nps.gov.


 Inside the Nature Center is an information center where there is always someone to explain about the center. There are displays explaining about birding and about the Rio Grande River. There are big windows where you can look out and see the river and the ducks, geese or other small birds that come to the Center. The first two photos show a bird in the corner that is not real. The


 A small section of the mountains in Polychrome Valley.
 Grizzly Bear! One of two cubs who crossed under a bridge with their mama.
 Dall Sheep. There were five of them scattered around the top and sides of this rock outcropping not far from the road.
 This is from about 35 miles away from The Mountain. Everyone on the bus was thrilled to be able to see this much of Denali.
 I like how you can see parts of the mountain through the clouds.
 The peaks are two miles apart!
 Twenty minutes later, at the Eielson Visitor Center, Denali was nearly obscured by the clouds.
 Gone! Denali is to the left of that center peak. I stayed at Eielson for more than an hour and The Mountain didn't come back out.